Event Storming is a technique defined and refined by Alberto Brandolini (@ziobrando). I fully agree the statement about this method, Event Storming is for now “The smartest approach to collaboration beyond silo boundaries”
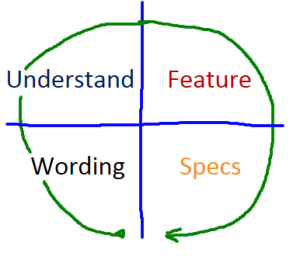
I don’t want to explain what Event Storming is, the concept is present in the IT world for a few years already and there are a lot of articles or videos explaining the basics. What I want to emphasize is WHY do we need to learn and apply this technique:
On the 18-19.10.2018 I had the opportunity to not only hear a great talk about Event Storming but also to be part of a 2 hours long hands-on session, all this powered by Kandddinsky (for me the best conference I visited this year) and by @kenny_baas (and @use case driven and @brunoboucard). In the last few years I participated on a few Event Storming sessions, mostly on community events, twice at cleverbridge but this time it was different. Maybe ES is like Unit Testing, you have to exercise and reflect about what went well and what must be improved. Anyway this time I learned and observed a few rules and principles new for me and their effects on the outcome. This is what I want to share here.
- You need a facilitator.
Both ES sessions I was part at cleverbridge have ended with frustration. All participants were willing to try it out but we had nobody to keep the chaos under control. Because as Kenny said “There will be chaos, this is guaranteed.” But this is OK, we – devs, product owners, sales people, etc. – have to learn fast to understand each other without learning the job of the “other party” or writing a glossary (I tried that already and didn’t helped 😐 ). Also we need somebody being able to feel and steer the dynamics in the room.
I disagree, I feel that for #eventstorming, you need to be more than a facilitator, you need to lead. The goal is not applying the rules, but knowledge transfer. If that doesn’t happen, you need to be creative. It’s analysis & modelling, that requires skill beyond moderating.
— Mathias Verraes (@mathiasverraes) October 25, 2018
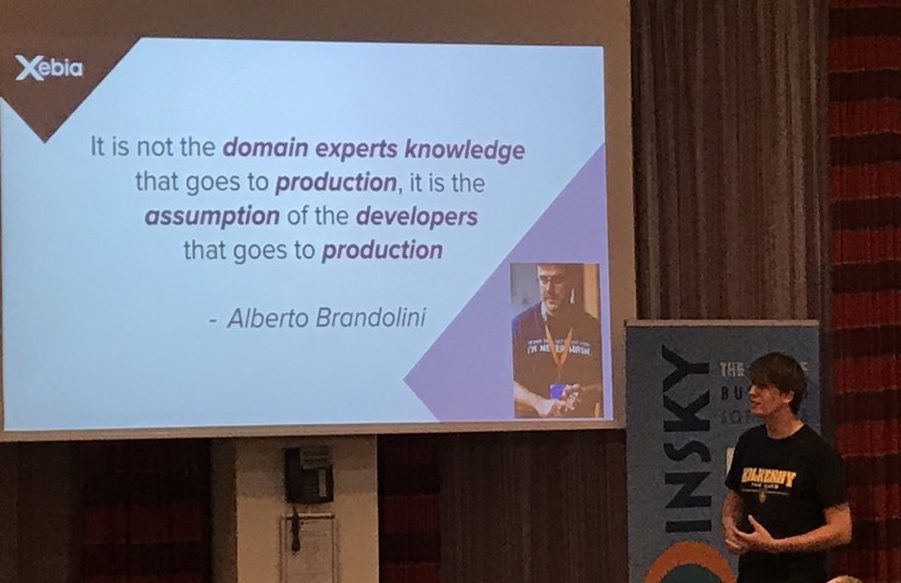
My role is sometimes to be “the dumbest person in the room”: I don’t know the domain and this allows me to ask “stupid” questions. Of course these questions are not random…
— Alberto Brandolini (@ziobrando) October 26, 2018
The tweets were written during a discussion about who could be a good facilitator. You can read the whole thread on Twitter if you like. Another good article summarizing the first impressions of @mathiasverraes as facilitator is this one. - Explain AND visualize the rules beforehand.
I skip for now the basics like the necessity of a very long free wall and that the events should visualize the business process evolving in time.
This are the additional rules I learned in the hands-on session:-
- no dev-talk! The developer is per se a species able to transform EVERYTHING in patterns and techniques and tables and columns and this ability is not helpful if one wants to know if we can solve a problem together. By using dev-speech the discussion will be driven to the technical “solvability” based on the current technical constraints like architecture. With ES we want to create or deepen our ubiquitous language , and this surely not includes the word “Message Bus” 😉
- Every discussion should happen on the board. There will be a lot of discussions and we tend to talk a lot about opinions and feelings. This won’t happen if we keep discussing about the business processes and events which are visualized in front of us – on the board.
- No discussions regarding persons not in the room. Discussing about what we think other people would mind are not productive and cannot lead to real results. Do not waste time with it, time is too short anyway.
- Open questions occurring during the storming should not be discussed (see the point above) but marked prominently with a red sticky. Do not waste time
- Do not discuss about everything, look for the money! The most important goal is to generate benefit and not to create the most beautiful design!
-
Tips for the Storming:
- “one person, one sharpie, one set of stickies”: everybody has important things to say, nobody should stay away from the board and the discussions.
- start with describing the business process, business rules, eventual consistent business decisions aka policies, other constraints you – or the product owner whom the business “belongs” – would like to model, and write the most important information somewhere visible for everybody.
- explain how ES works: every business relevant event should be placed on a time line and should be formulated in the past tense. Business relevant is everything somebody (Kibana is not a person, sorry 😉 ) would like know about.
- explain the rules and the legend (you need a color legend to be able to read the results later).
- give the participants time (we had 15 minutes) to write every business event they think it is important to know about on orange stickies. Also write the business rules (the wide dark red ones) and the product decisions (the wide pink ones) on stickies and put them there where they are applied. The rules before the event, the policies after one event happened.
- start putting the stickies on the wall, throw away the duplicates, discuss and maybe reformulate the rest. After you are done try to tell the story based on what you can read on the wand. After this read the stickies from the end to the start. With these methods you should be able to discover if you have gaps or used wrong assumptions by modelling the process you wanted to describe.
- mark known processes (like “manual process”) with the same stickies as the policies and do not waste time discussing it further.
- start to discuss the open questions. Almost always there are different ways to answer this questions and if you cannot decide in a few seconds than postpone it. But as default: decide to create the event and measure how often happens so that later on you can make the right decision!
Event Storming – measure now, decide later During my hands-on session @kandddinsky I discussed making exceptions in your #eventstorming explicit as Domain Events. This way we can monitor them for feedback that can have an impact on our product management. I have written it down in my blog: https://t.co/S6ZaNWznmc
— Kenny Baas-Schwegler (@kenny_baas) October 22, 2018
Another good article for this topic is this one from @thinkb4coding


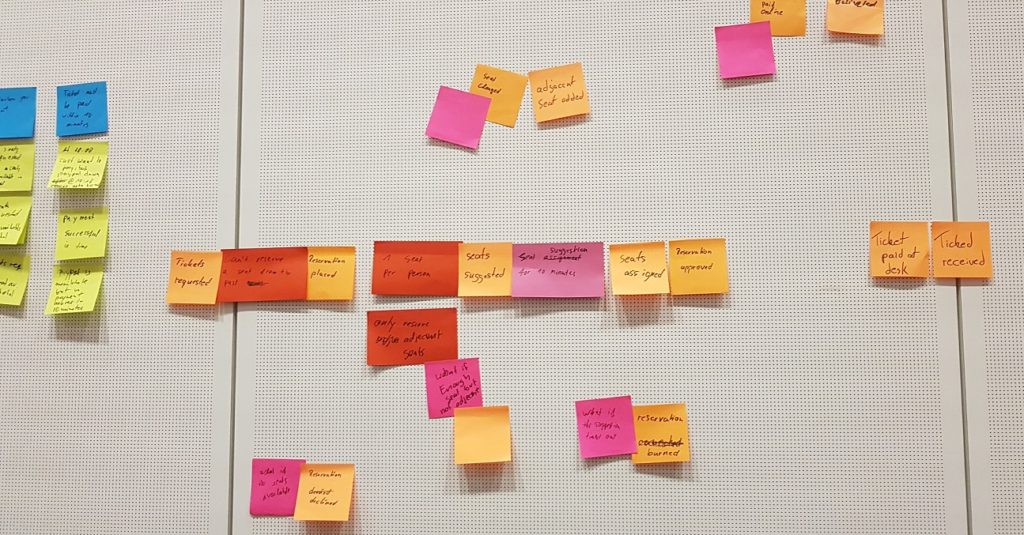
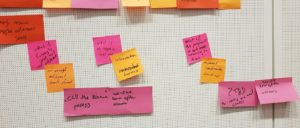
At this point we could have continued with the process to find aggregates and bounded contexts but we didn’t. Instead we switched the methodology to Specifications by Example – in my opinion a really good idea!
We prioritized the rules and policies and for the most important ones we defined examples – just like we are doing it if we discuss a feature and try to find the algorithm.
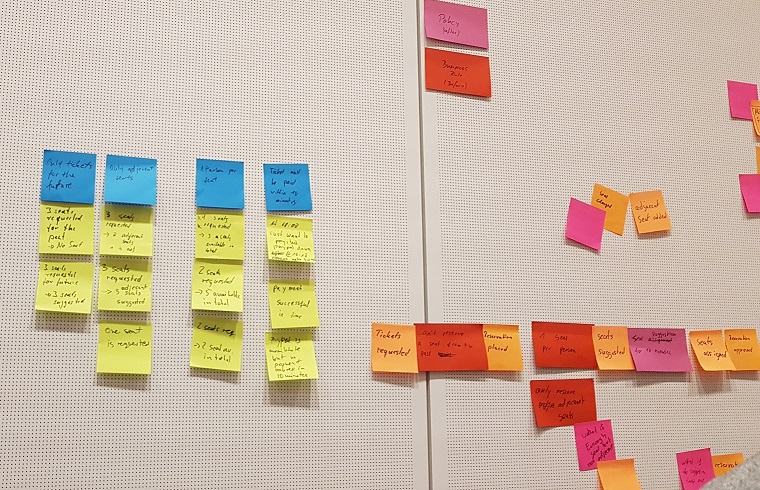
Example: in our ticket reservation business we had a rule saying “no overbooking, one ticket per seat”. In order to find the algorithm we defined different examples:
- 4 tickets should be reserved and there are 5 tickets left
- 4 tickets should be reserved and there are 3 tickets left
- 4 tickets should be reserved and all tickets are already reserved.
With this last step we can verify if our ideas and assumptions will work out and we can gain even more insights about the business rules and business policies we defined – and all this not as developer writing if-else blocks but together with the other stake holders. At the same time the non-techie people would understand in the future what impact these rules and decisions have on the product we build together. The side-effect having the specifications already defined is also a great benefit as these are the acceptance tests which will be built by the developer and read and used by the product owner.
More about the example and the results can you read on the blog of Kenny Baas-Schwegler.
I hope I covered everything and have succeeded to reproduce the most important learning of the 2 days ( I tend to oversee things thinking “it is obvious”). If not: feel free to ask, I will be happy to answer 🙂
Happy Storming!
Update: we had our first event storming and it was good!
Unfortunately we didn’t get to define the examples (not enough time). Most of the rules described above were accepted really well (explain the rules, create a legend for the stickies, flag everything out of scope as Open Question). Where I as facilitator need more training is by keeping the discussion ON the board and not beside. I have also a few new takeaways:
- the PO describes his feature and gives answers, but he doesn’t write stickies. The main goal ist to share his vision. This means, he should test us if we understood the same vision. As bonus he should complete his understanding of the feature trough the questions which appear during the storming.
- one color means one action/meaning. We had policies and processes on the same red stickies and this was misleading.
- if you have a really complex domain
(like e-commerce for SaaS products in our case) or really complex features start with one happy path example. Define this example and create the event “stream” with this example. At the end you should still add the other, not so happy-path examples.